

Run the engine and the console together
This page starts the whole product on your computer: the engine, the admin console, a PostgreSQL database and a small proxy that puts all of them on one address. After the files are written, everything happens in the browser. It takes about fifteen minutes.
You need Docker with Compose (Docker Desktop, or Docker Engine with the Compose plugin),
openssl, and port 8080 free on your computer. To run the same stack on a server with TLS,
Docker Compose starts from what you build here.
How the pieces fit
Section titled “How the pieces fit”Your browser talks to one address, http://localhost:8080. The proxy sends each request to the
piece that answers it:
| Path | Answered by |
|---|---|
/api/admin/... | The engine's Admin API |
/api/... and /.well-known/... | The engine's Content API |
| Everything else | The admin console |
The console's own server calls the engine through the same proxy. Because the browser sees a single address, sign-in cookies work with no extra settings.
1. Write the files
Section titled “1. Write the files”Make a folder for the stack and work inside it:
mkdir lyeve-local && cd lyeve-localSave this as docker-compose.yml:
services:  db:    image: postgres:16-alpine    restart: unless-stopped    environment:      POSTGRES_USER: lyeve      POSTGRES_PASSWORD: ${DB_PASSWORD}      POSTGRES_DB: lyeve    volumes:      - db-data:/var/lib/postgresql/data    healthcheck:      test: ["CMD-SHELL", "pg_isready -U lyeve -d lyeve"]      interval: 5s      timeout: 5s      retries: 10
  engine:    image: ghcr.io/lyeve-labs/lyeve-core:latest    restart: unless-stopped    environment:      APP_ENV: development      DATABASE_URL: postgres://lyeve:${DB_PASSWORD}@db:5432/lyeve?sslmode=disable      JWT_SECRET: ${JWT_SECRET}      ENCRYPTION_KEY: ${ENCRYPTION_KEY}      ADMIN_CONSOLE_KEY: ${ADMIN_CONSOLE_KEY}      LYEVE_SETUP_TOKEN: ${SETUP_TOKEN}      LYEVE_CONSOLE_URL: http://localhost:8080      TRUSTED_PROXIES: 172.28.0.0/24      LYEVE_LICENSE_KEY: ${LYEVE_LICENSE_KEY:-}    volumes:      - engine-state:/var/lib/lyeve      - uploads-data:/app/uploads    depends_on:      db:        condition: service_healthy
  admin:    image: ghcr.io/lyeve-labs/lyeve-admin:latest    restart: unless-stopped    environment:      ORIGIN: http://localhost:8080      CORE_INTERNAL_URL: http://proxy:8080      CORE_API_INTERNAL_URL: http://proxy:8080      ADMIN_CONSOLE_KEY: ${ADMIN_CONSOLE_KEY}      ADDRESS_HEADER: X-Forwarded-For      XFF_DEPTH: "1"    depends_on:      - proxy
  proxy:    image: caddy:2    restart: unless-stopped    ports:      - "8080:8080"    volumes:      - ./Caddyfile:/etc/caddy/Caddyfile:ro    depends_on:      - engine
networks:  default:    ipam:      config:        - subnet: 172.28.0.0/24
volumes:  db-data:  engine-state:  uploads-data:
Save this as Caddyfile in the same folder:
:8080 { handle /api/admin/* { reverse_proxy engine:3001 } handle /api/* { reverse_proxy engine:3002 } handle /.well-known/* { reverse_proxy engine:3002 } handle { reverse_proxy admin:3002 }}What the less obvious lines do:
| Line | Why it is there |
|---|---|
APP_ENV: development | Relaxes the checks a production engine makes, such as HTTPS-only cookies, so the stack runs on plain http |
sslmode=disable | The database is reachable only inside the Compose network, so the connection needs no TLS here |
LYEVE_SETUP_TOKEN | You choose the token that guards the first administrator, so you do not have to find it in the engine's log |
ORIGIN | The address you open in the browser. It has to match exactly, port included, or sign-in fails |
LYEVE_CONSOLE_URL | The same address, for the engine. Password reset and sign-in link emails point there |
CORE_INTERNAL_URL, CORE_API_INTERNAL_URL | Where the console's server reaches the engine: through the proxy, by its name inside the network |
ADMIN_CONSOLE_KEY | The same value on both sides. The console signs each call with the browser's address, so sign-in limits count each person rather than the console |
TRUSTED_PROXIES | The network's address range, which the networks block fixes. The engine then believes the client address the proxy passes on |
engine-state volume | Keeps the engine's signing key. Without it, every restart signs everyone out |
2. Write the secrets
Section titled “2. Write the secrets”Compose fills each ${...} from a file named .env in the same folder. Generate it once:
cat > .env <<SECRETSDB_PASSWORD=$(openssl rand -hex 24)JWT_SECRET=$(openssl rand -hex 32)ENCRYPTION_KEY=$(openssl rand -hex 32)ADMIN_CONSOLE_KEY=$(openssl rand -hex 32)SETUP_TOKEN=$(openssl rand -hex 16)LYEVE_LICENSE_KEY=SECRETSKeep .env out of version control. ENCRYPTION_KEY protects stored secrets such as
two-factor seeds and provider credentials, so a new value later makes them unreadable. Leave
LYEVE_LICENSE_KEY empty to run the free features, which make a complete CMS.
3. Start the stack
Section titled “3. Start the stack”docker compose up -ddocker compose psThe first start pulls four images, then the engine creates its tables. When docker compose ps
shows every service running and the engine (healthy), ask the engine whether it is ready for
setup:
curl http://localhost:8080/api/admin/setup{"token_source":"env","setup_required":true}setup_required stays true until the first administrator exists. If curl cannot connect, give
the engine a few more seconds, then read docker compose logs engine.
4. Create the first administrator
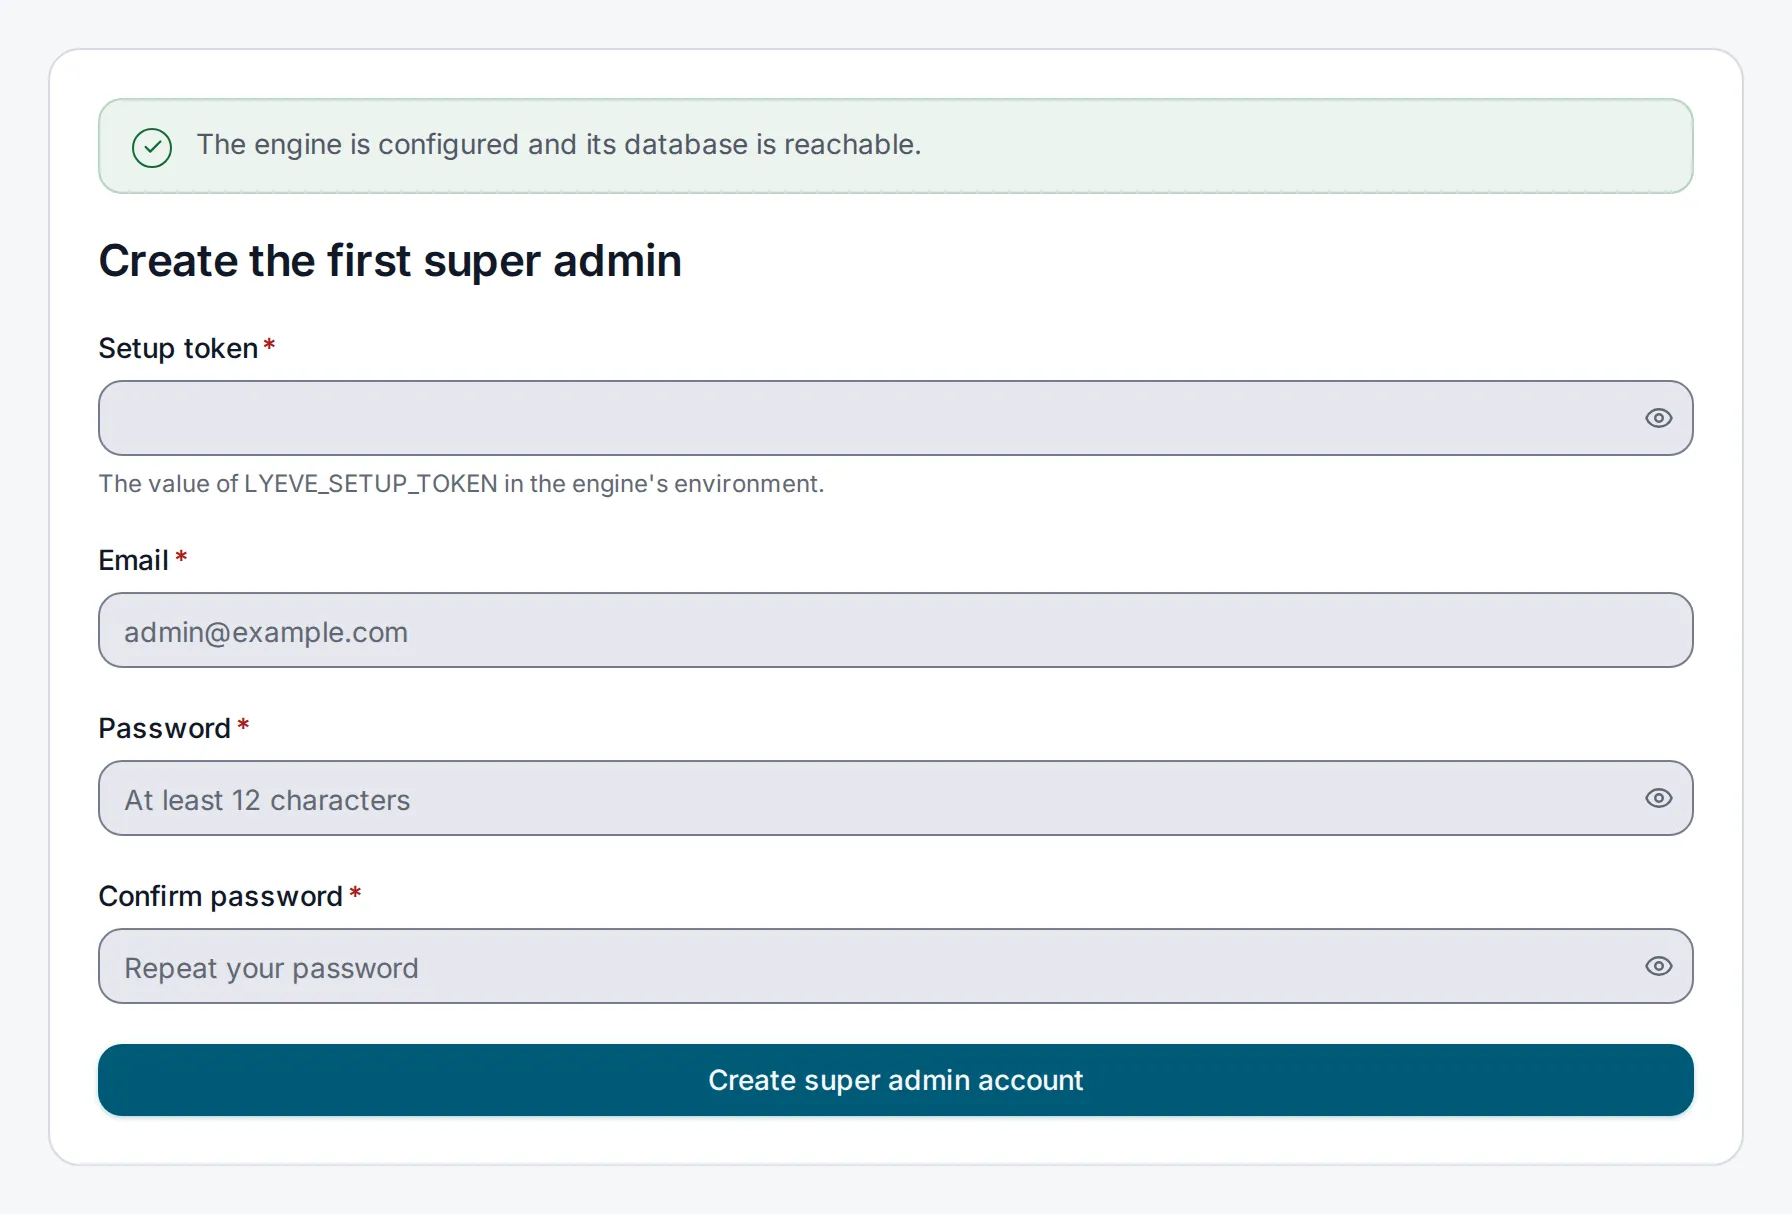
Section titled “4. Create the first administrator”Open http://localhost:8080. A new install sends you to the setup page.
-
Paste the setup token. It is the
SETUP_TOKENline of your.env:Terminal window grep SETUP_TOKEN .env -
Enter your email address and a password. The default policy asks for at least 12 characters, with an upper-case letter, a lower-case letter and a digit, and refuses common passwords.
-
Choose Create super admin account.
The console signs you in and opens the Dashboard. The account holds the super_admin role,
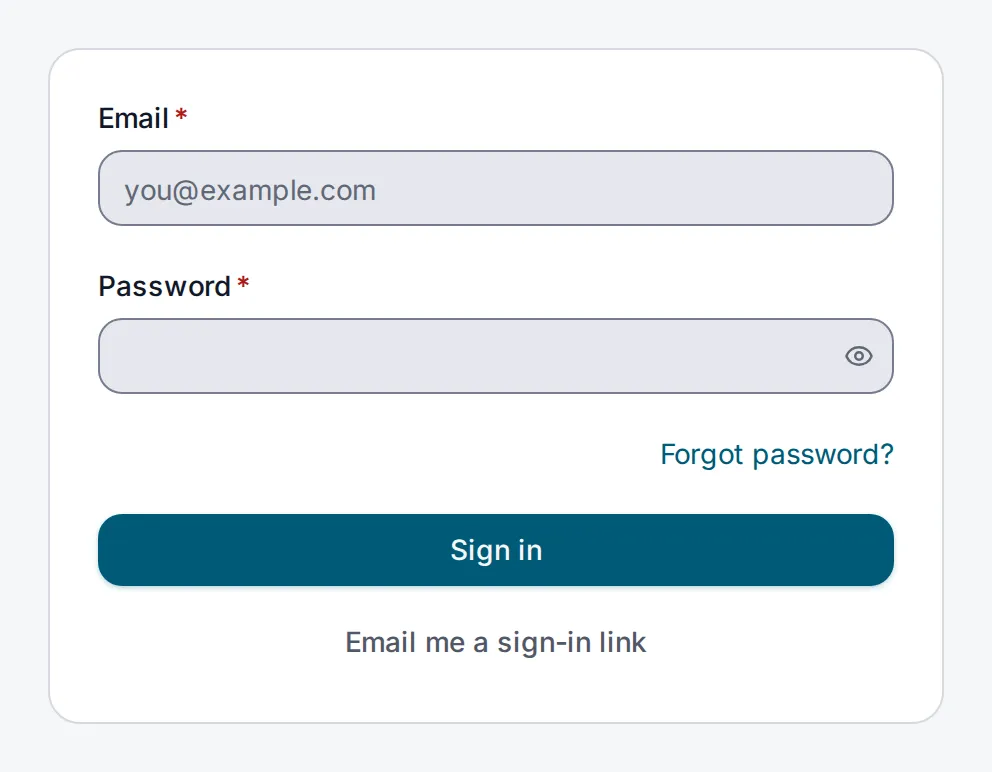
which can do everything, including creating the other accounts. Next time, sign in at the same
address:
5. Find your way around
Section titled “5. Find your way around”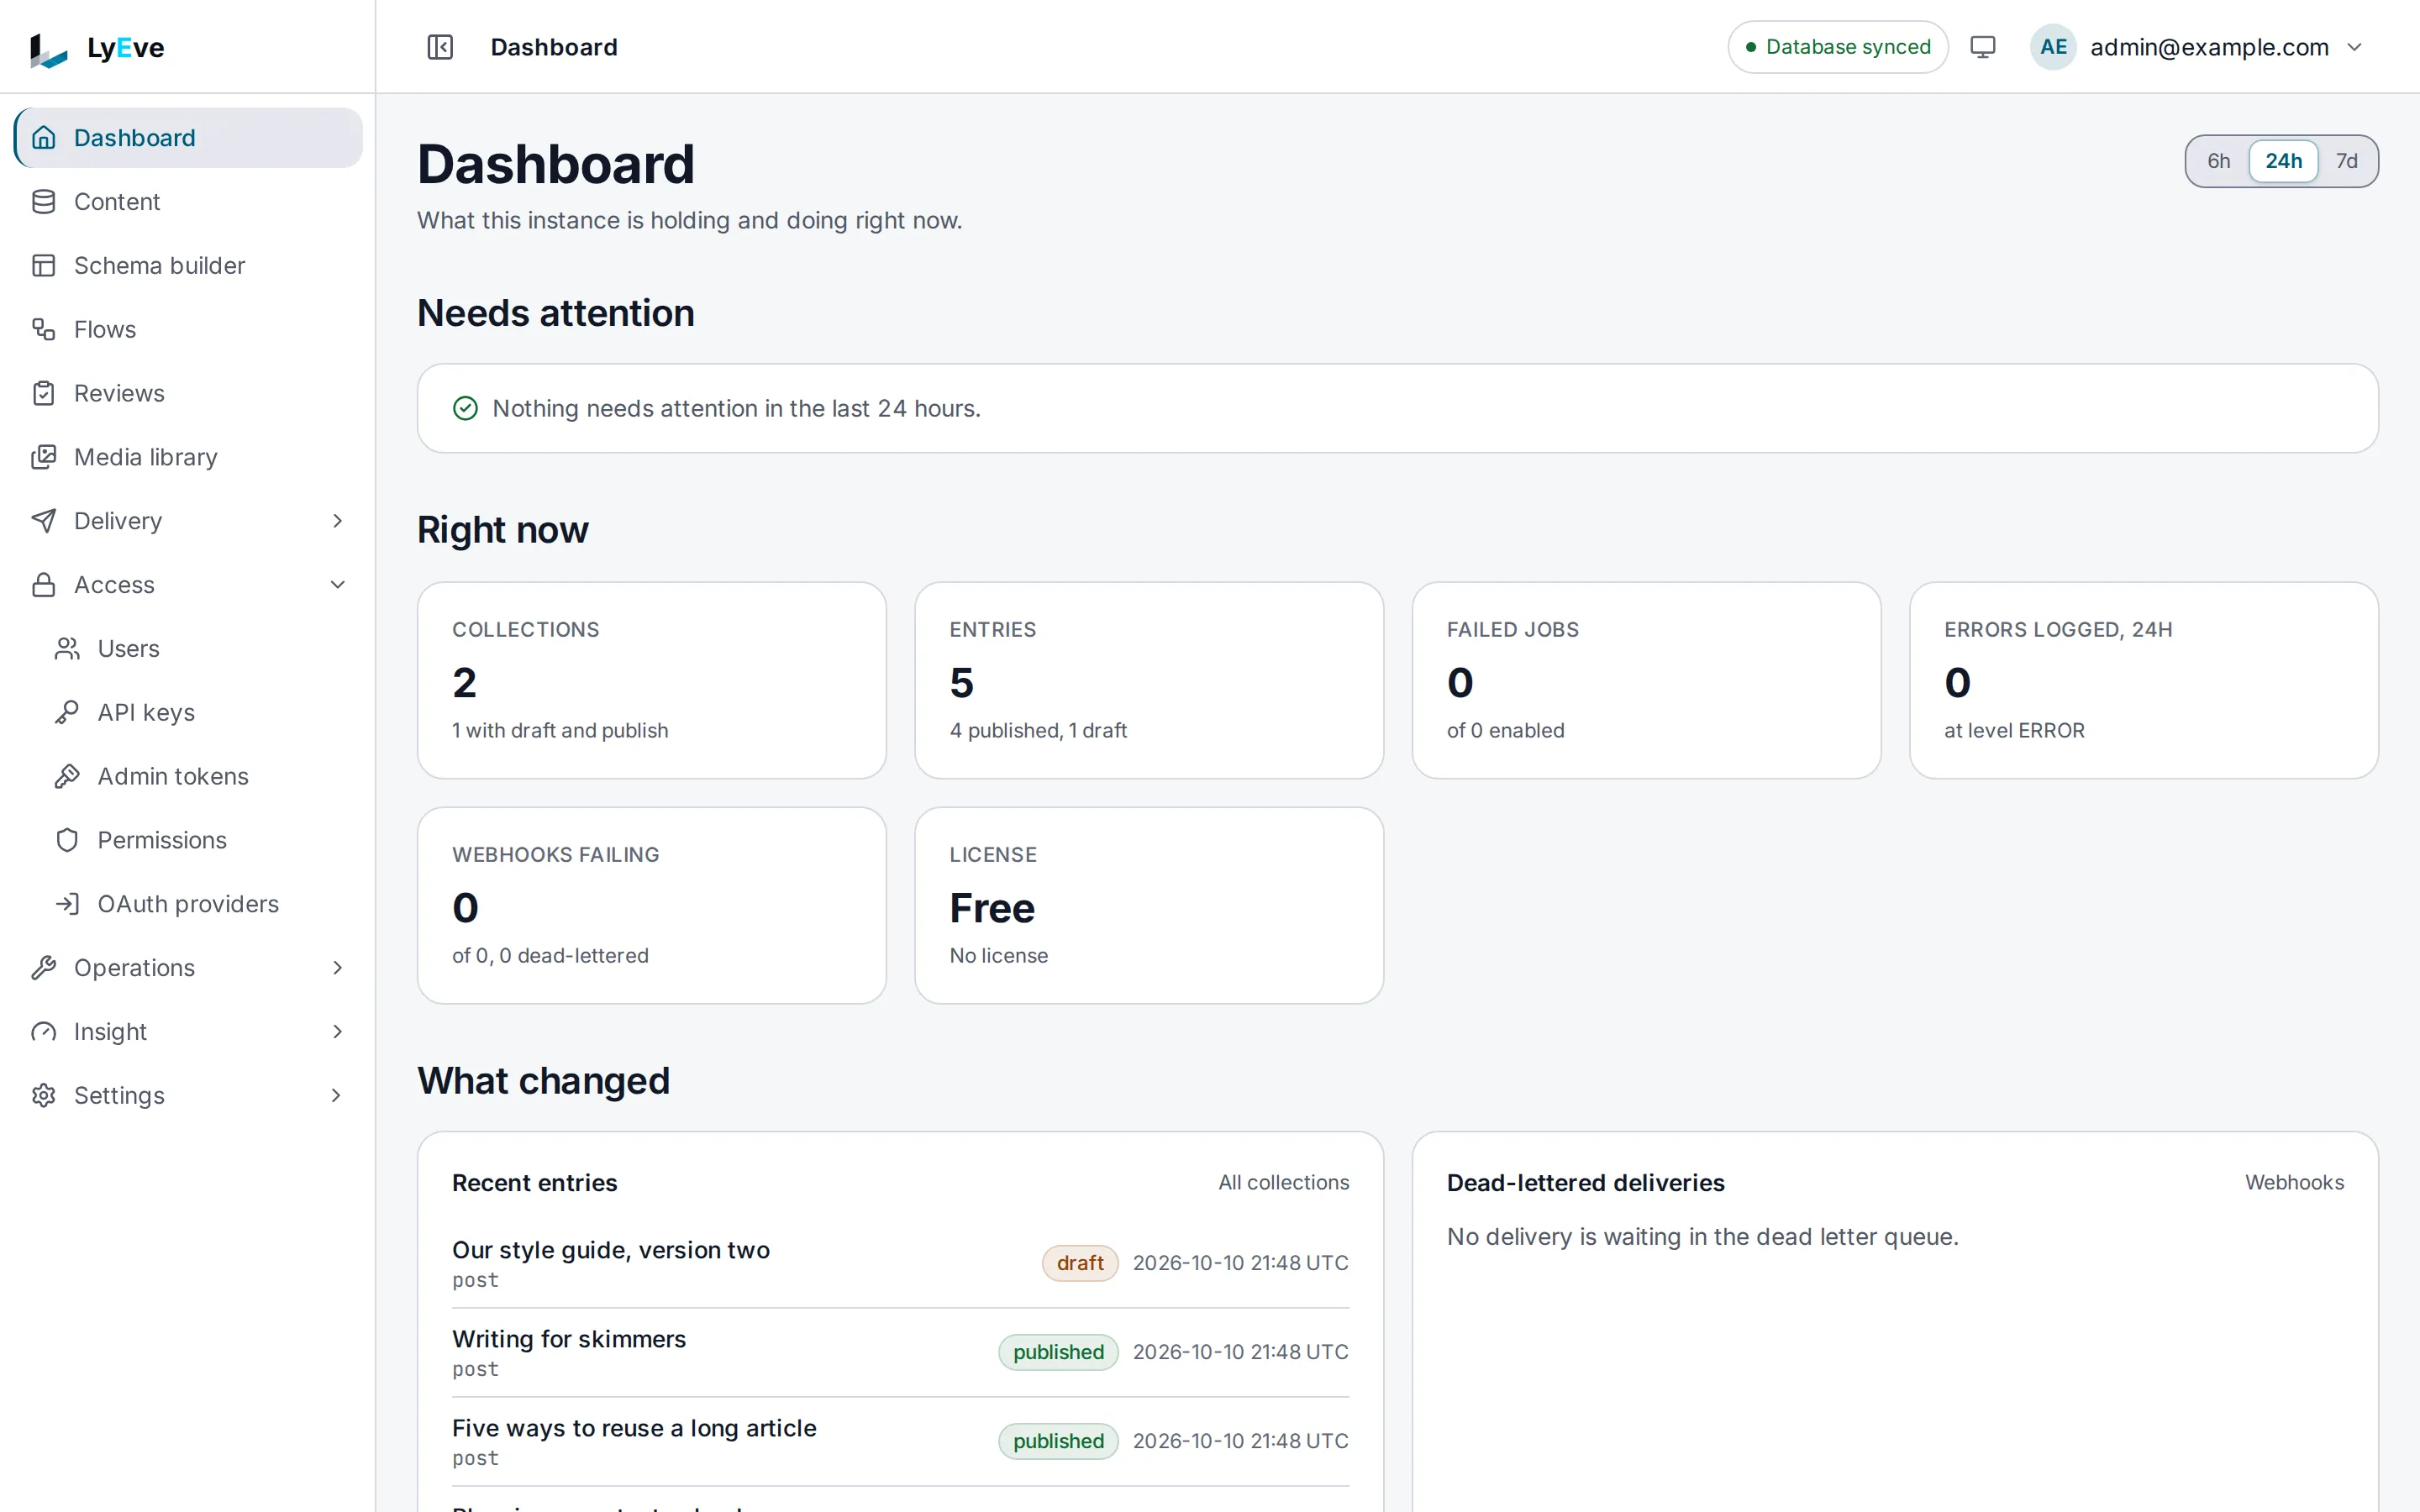
The Dashboard says what the instance holds and what needs attention. The sidebar groups every other screen by the job it does:
| Sidebar | What you do there |
|---|---|
| Content | Browse collections, then write, publish and restore entries |
| Schema builder | Define content types and their fields, preview a change and apply it |
| Flows | Build custom API endpoints and automations on a canvas |
| Reviews | Send entries through an editorial review before they publish |
| Media library | Upload, describe, publish and find files |
| Delivery | Webhooks, the API reference, API access and releases: how other systems reach the content |
| Access | Users, API keys, admin tokens, permissions and sign-in providers |
| Operations | Scheduled jobs, the features that are running, tenants and quotas |
| Insight | Logs, errors, analytics and performance |
| Settings | Your account, email, the license, configuration, security and rate limits |
What appears depends on your role and on the features your license covers. A screen for a feature that is not running says so and how to turn it on.
6. Create a content type and an entry
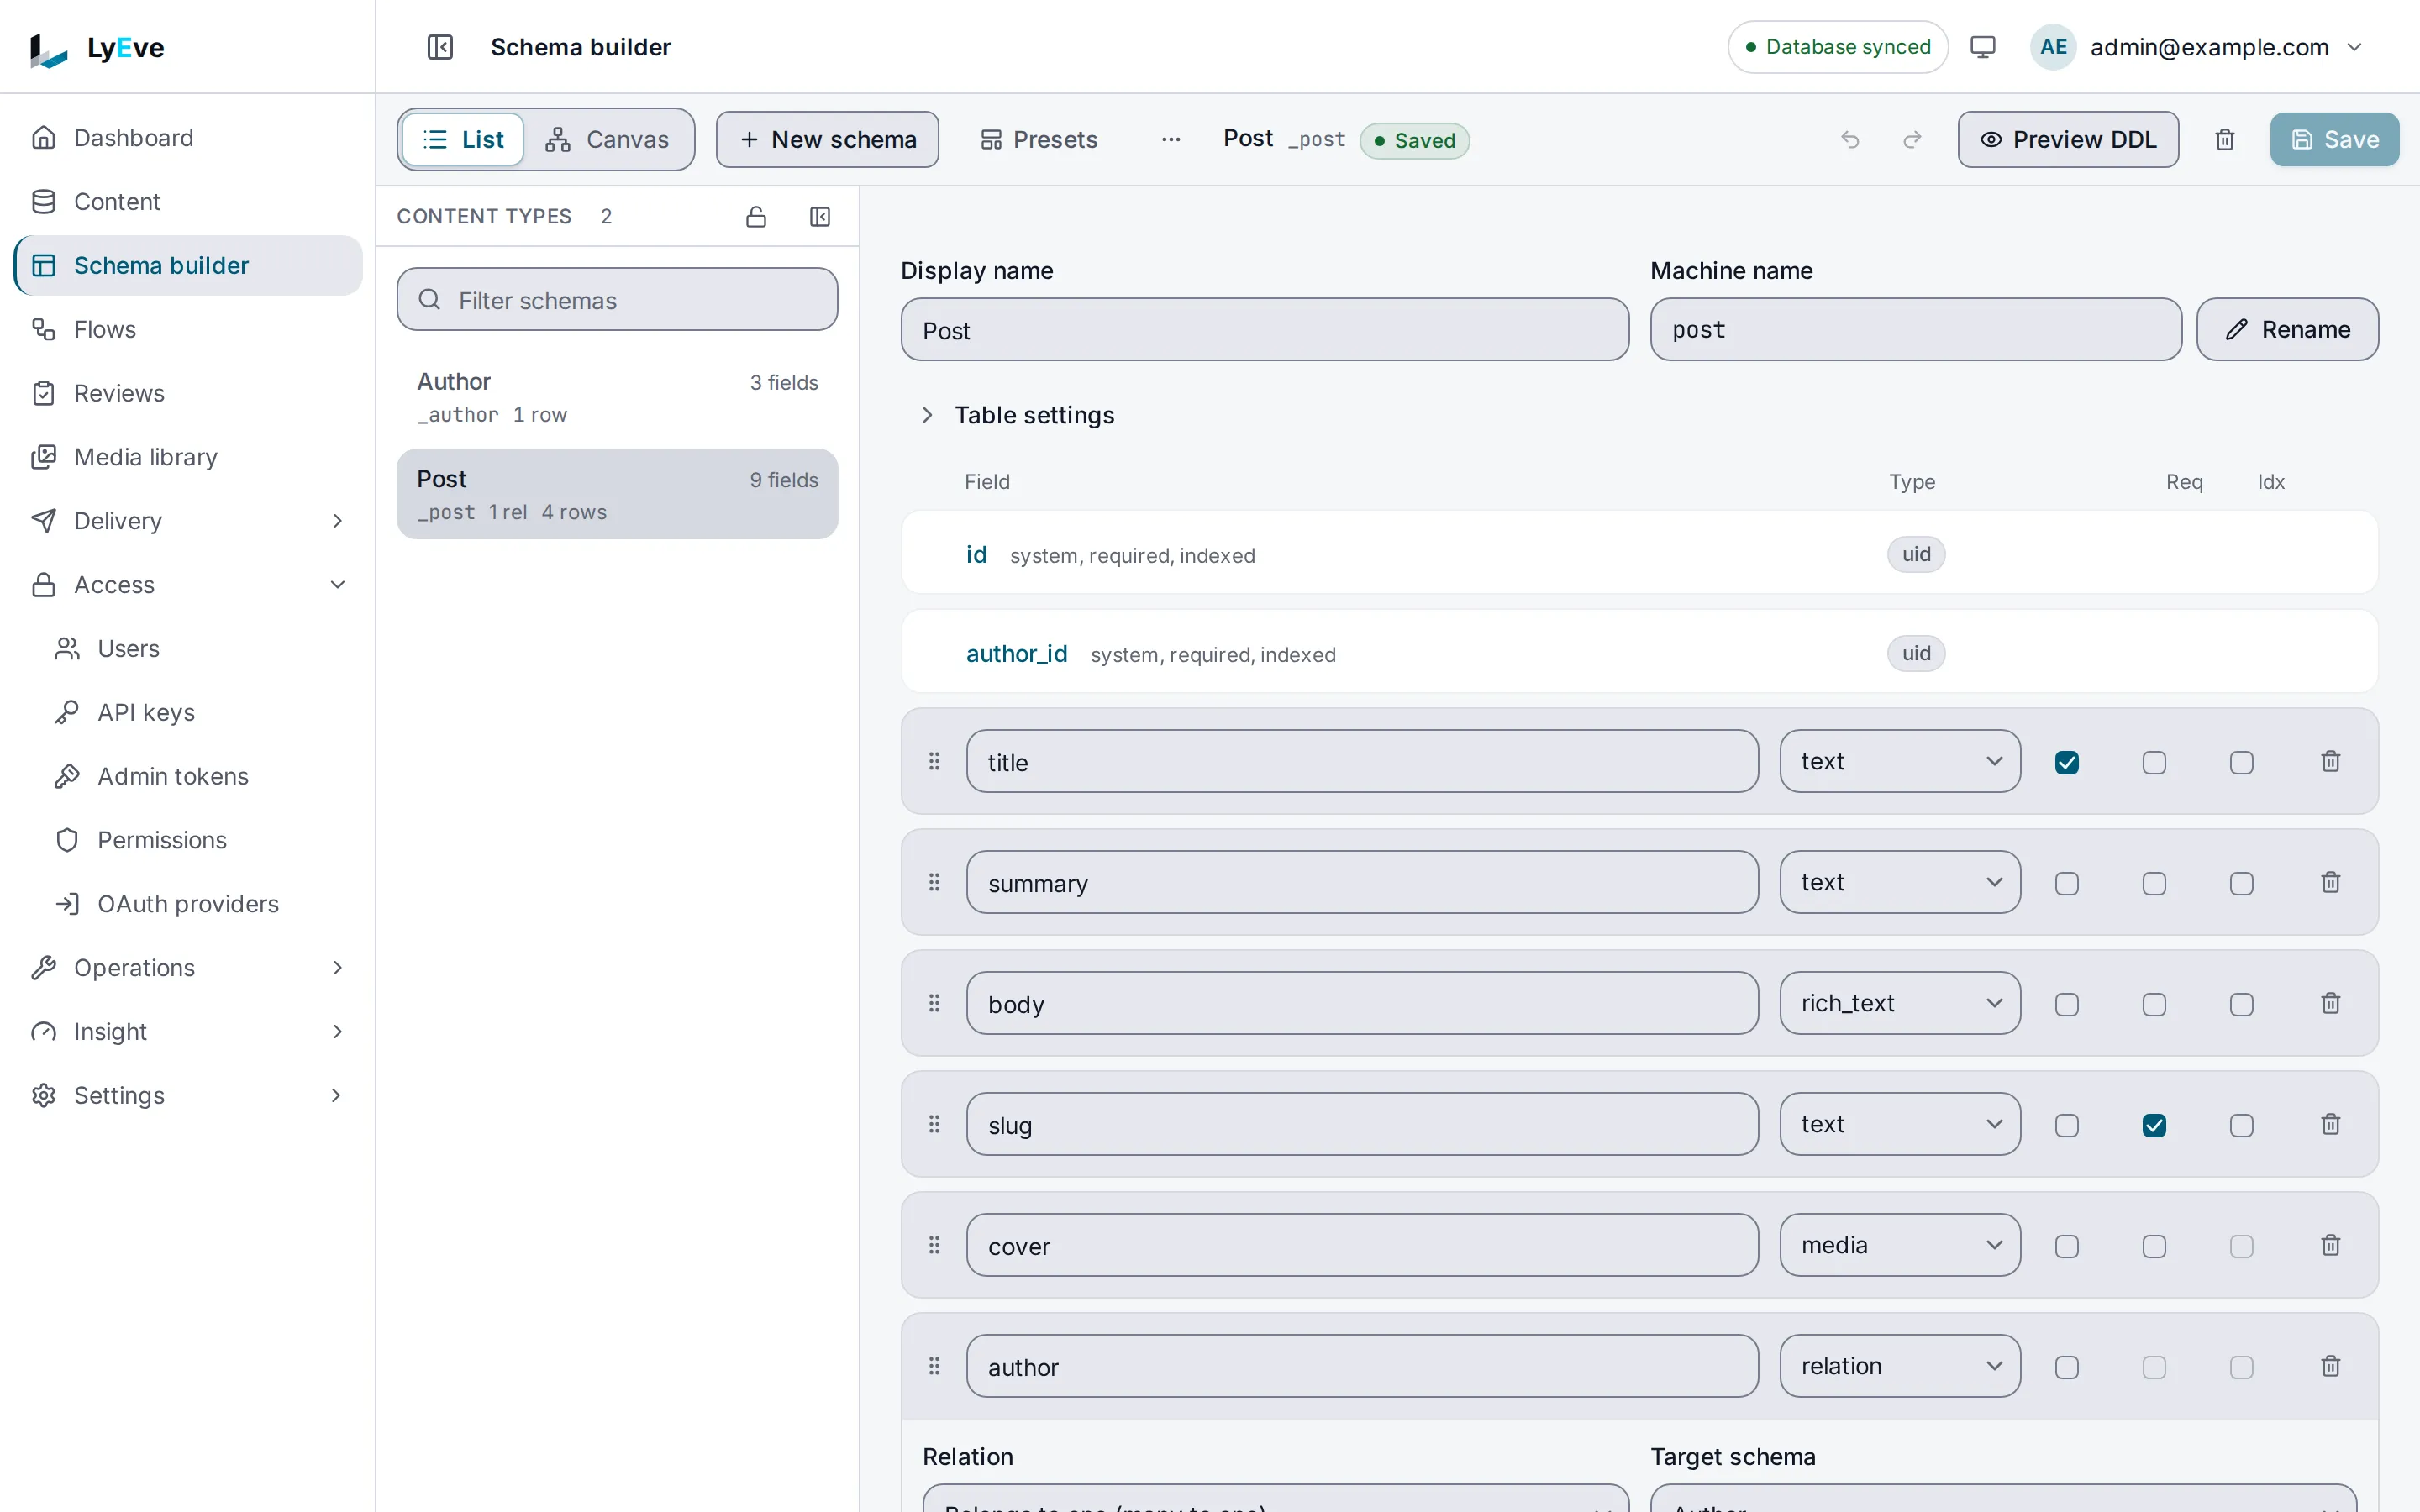
Section titled “6. Create a content type and an entry”- Open Schema builder and choose New schema.
- Enter a display name, such as
Post. The machine name,post, is filled in from it and is the name the APIs use. - Choose Add field for each field. Give
titlethe typetextand mark it required, and givebodythe typerich_text. - Choose Preview DDL to see what the change will do to the database, then Save.
- Open Content, pick Post and choose New entry. Fill in the fields and choose Create.
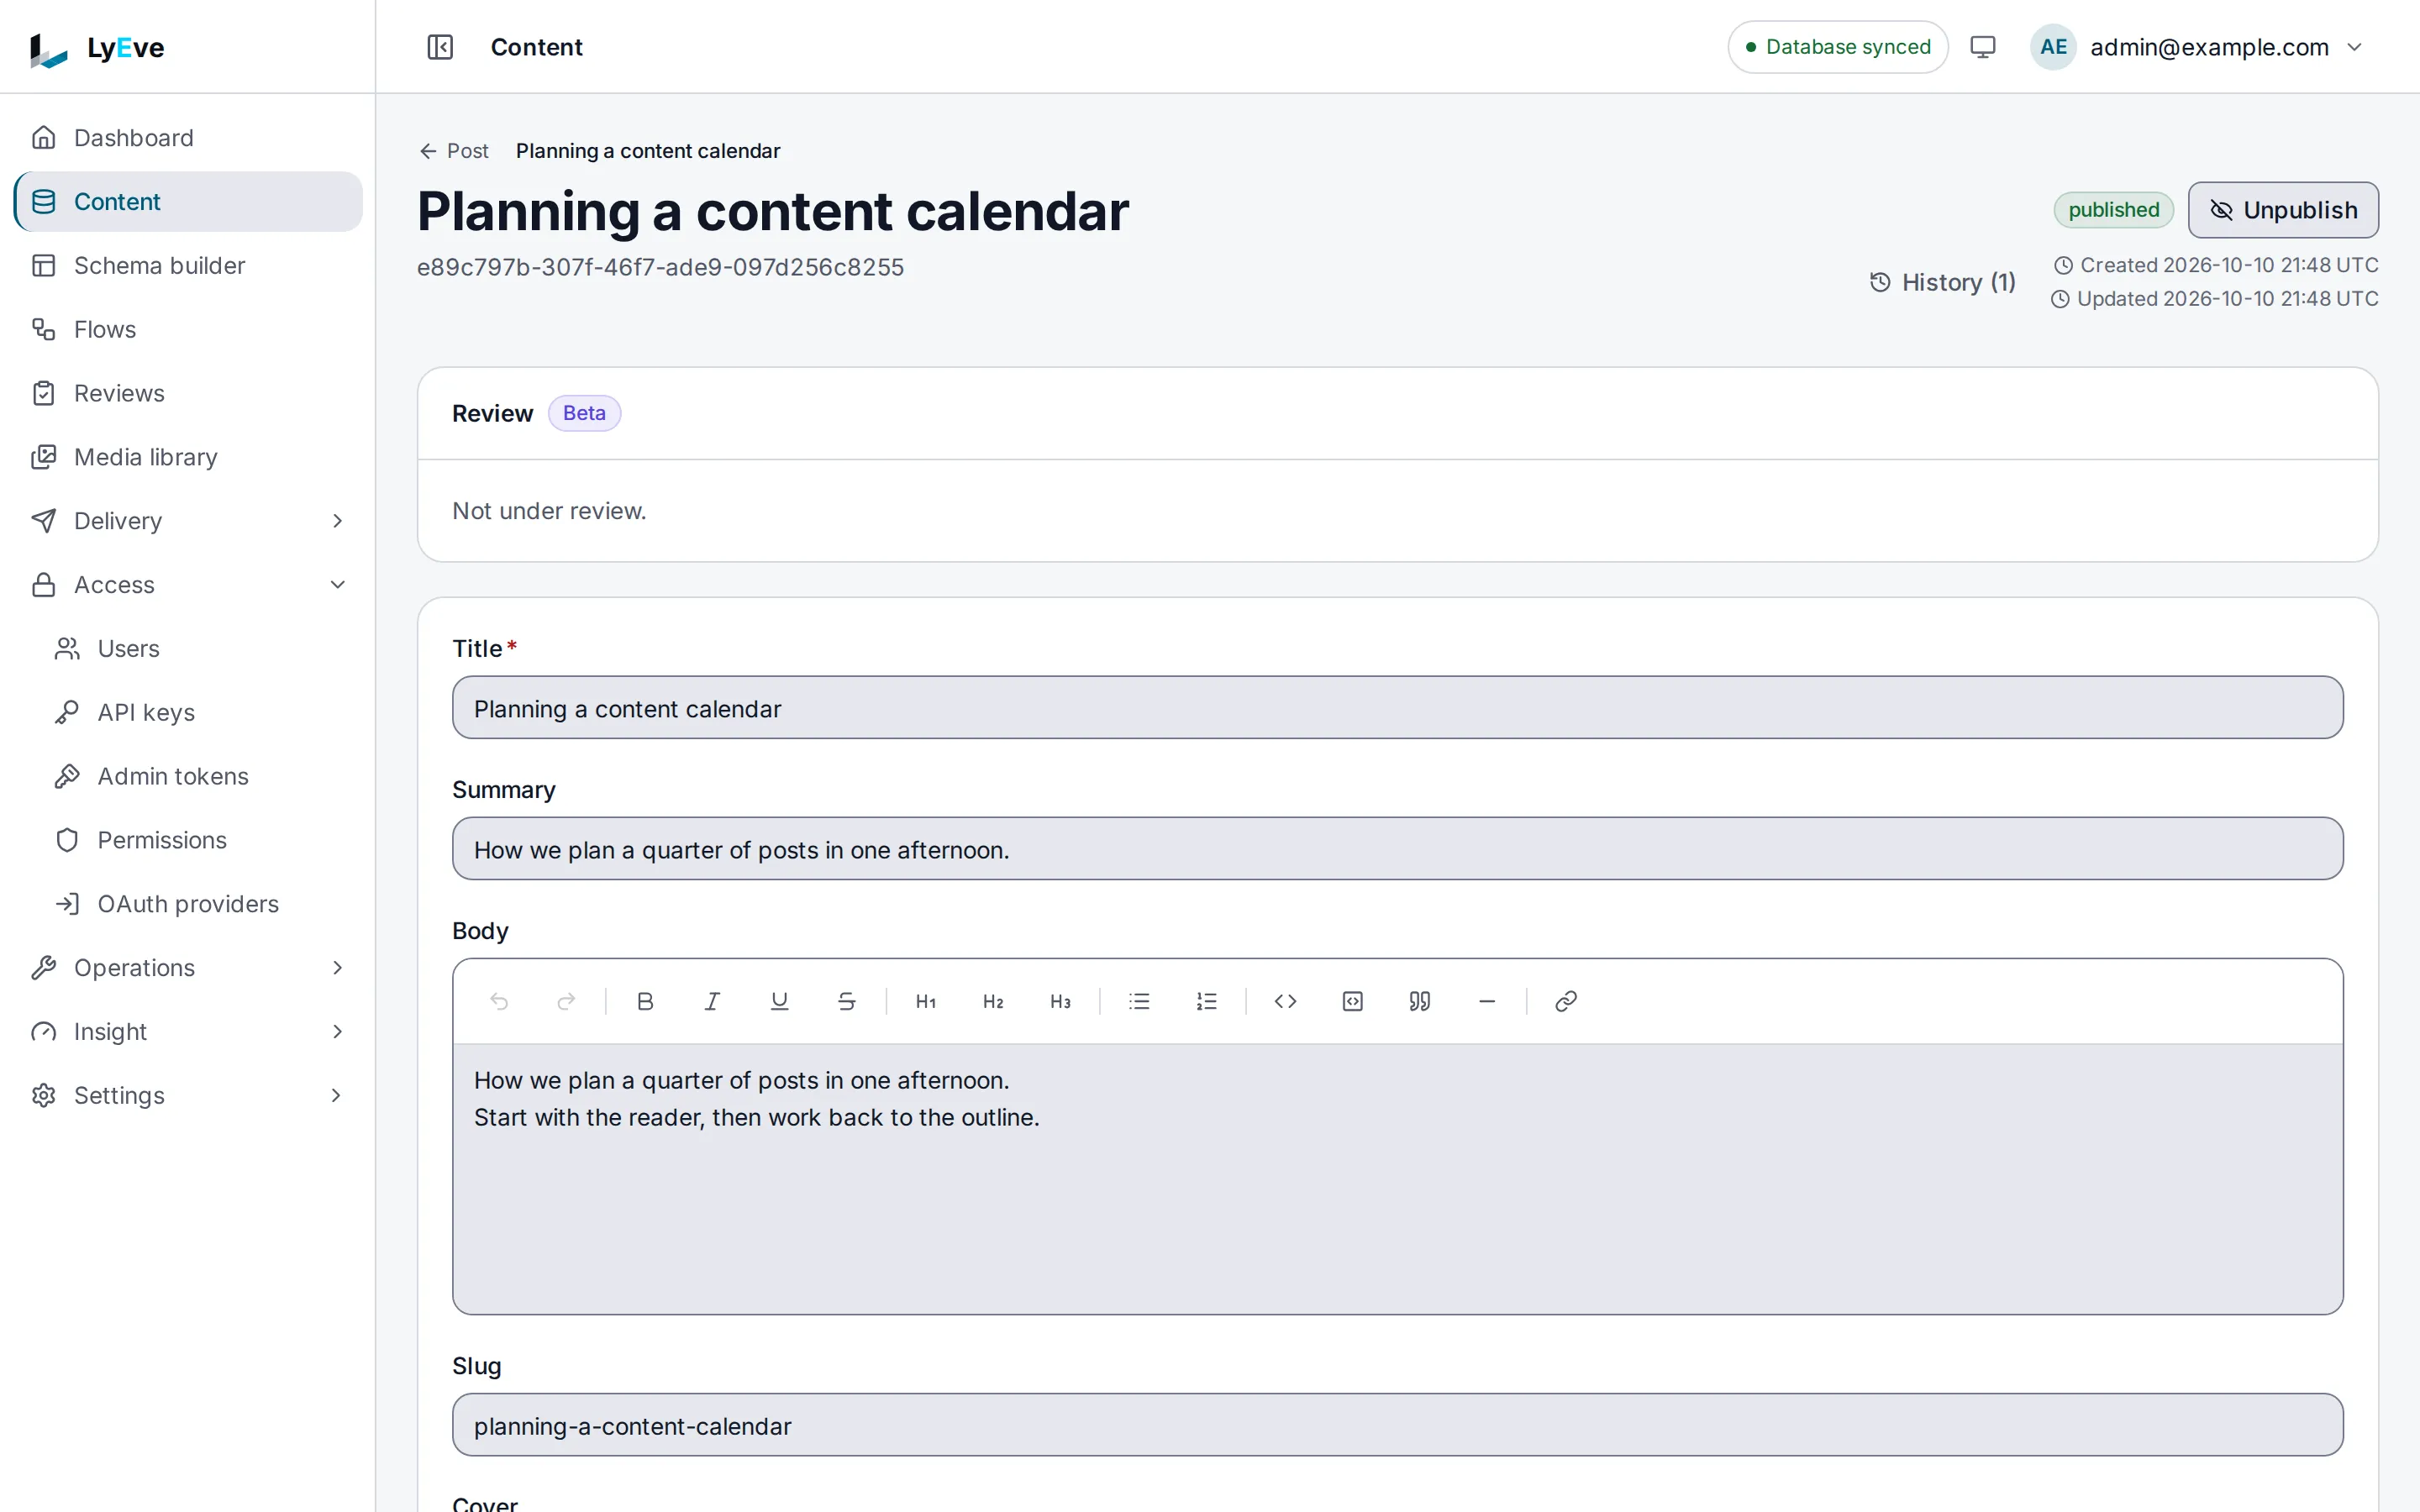
Your entry is now readable over the Content API at http://localhost:8080/api/v1/content/post
with a token or an API key. Your first content type builds a blog with
authors and drafts, and Creating and editing content covers
each kind of field.
7. Change a setting
Section titled “7. Change a setting”The engine reads its settings when it starts, so a change is an edit and a restart. Try one: make sign-in sessions last 30 minutes instead of 15.
-
Add a line under the engine's
environmentindocker-compose.yml:JWT_EXPIRY_SECS: "1800" -
Apply it:
Terminal window docker compose up -dCompose recreates the engine, because its settings changed, and leaves the other containers running. Use
up -dafter every change.docker compose restartrestarts a container with the settings it already had, so it ignores the edit. -
Open Settings > Configuration.
JWT_EXPIRY_SECSnow reads1800, set by an environment variable.
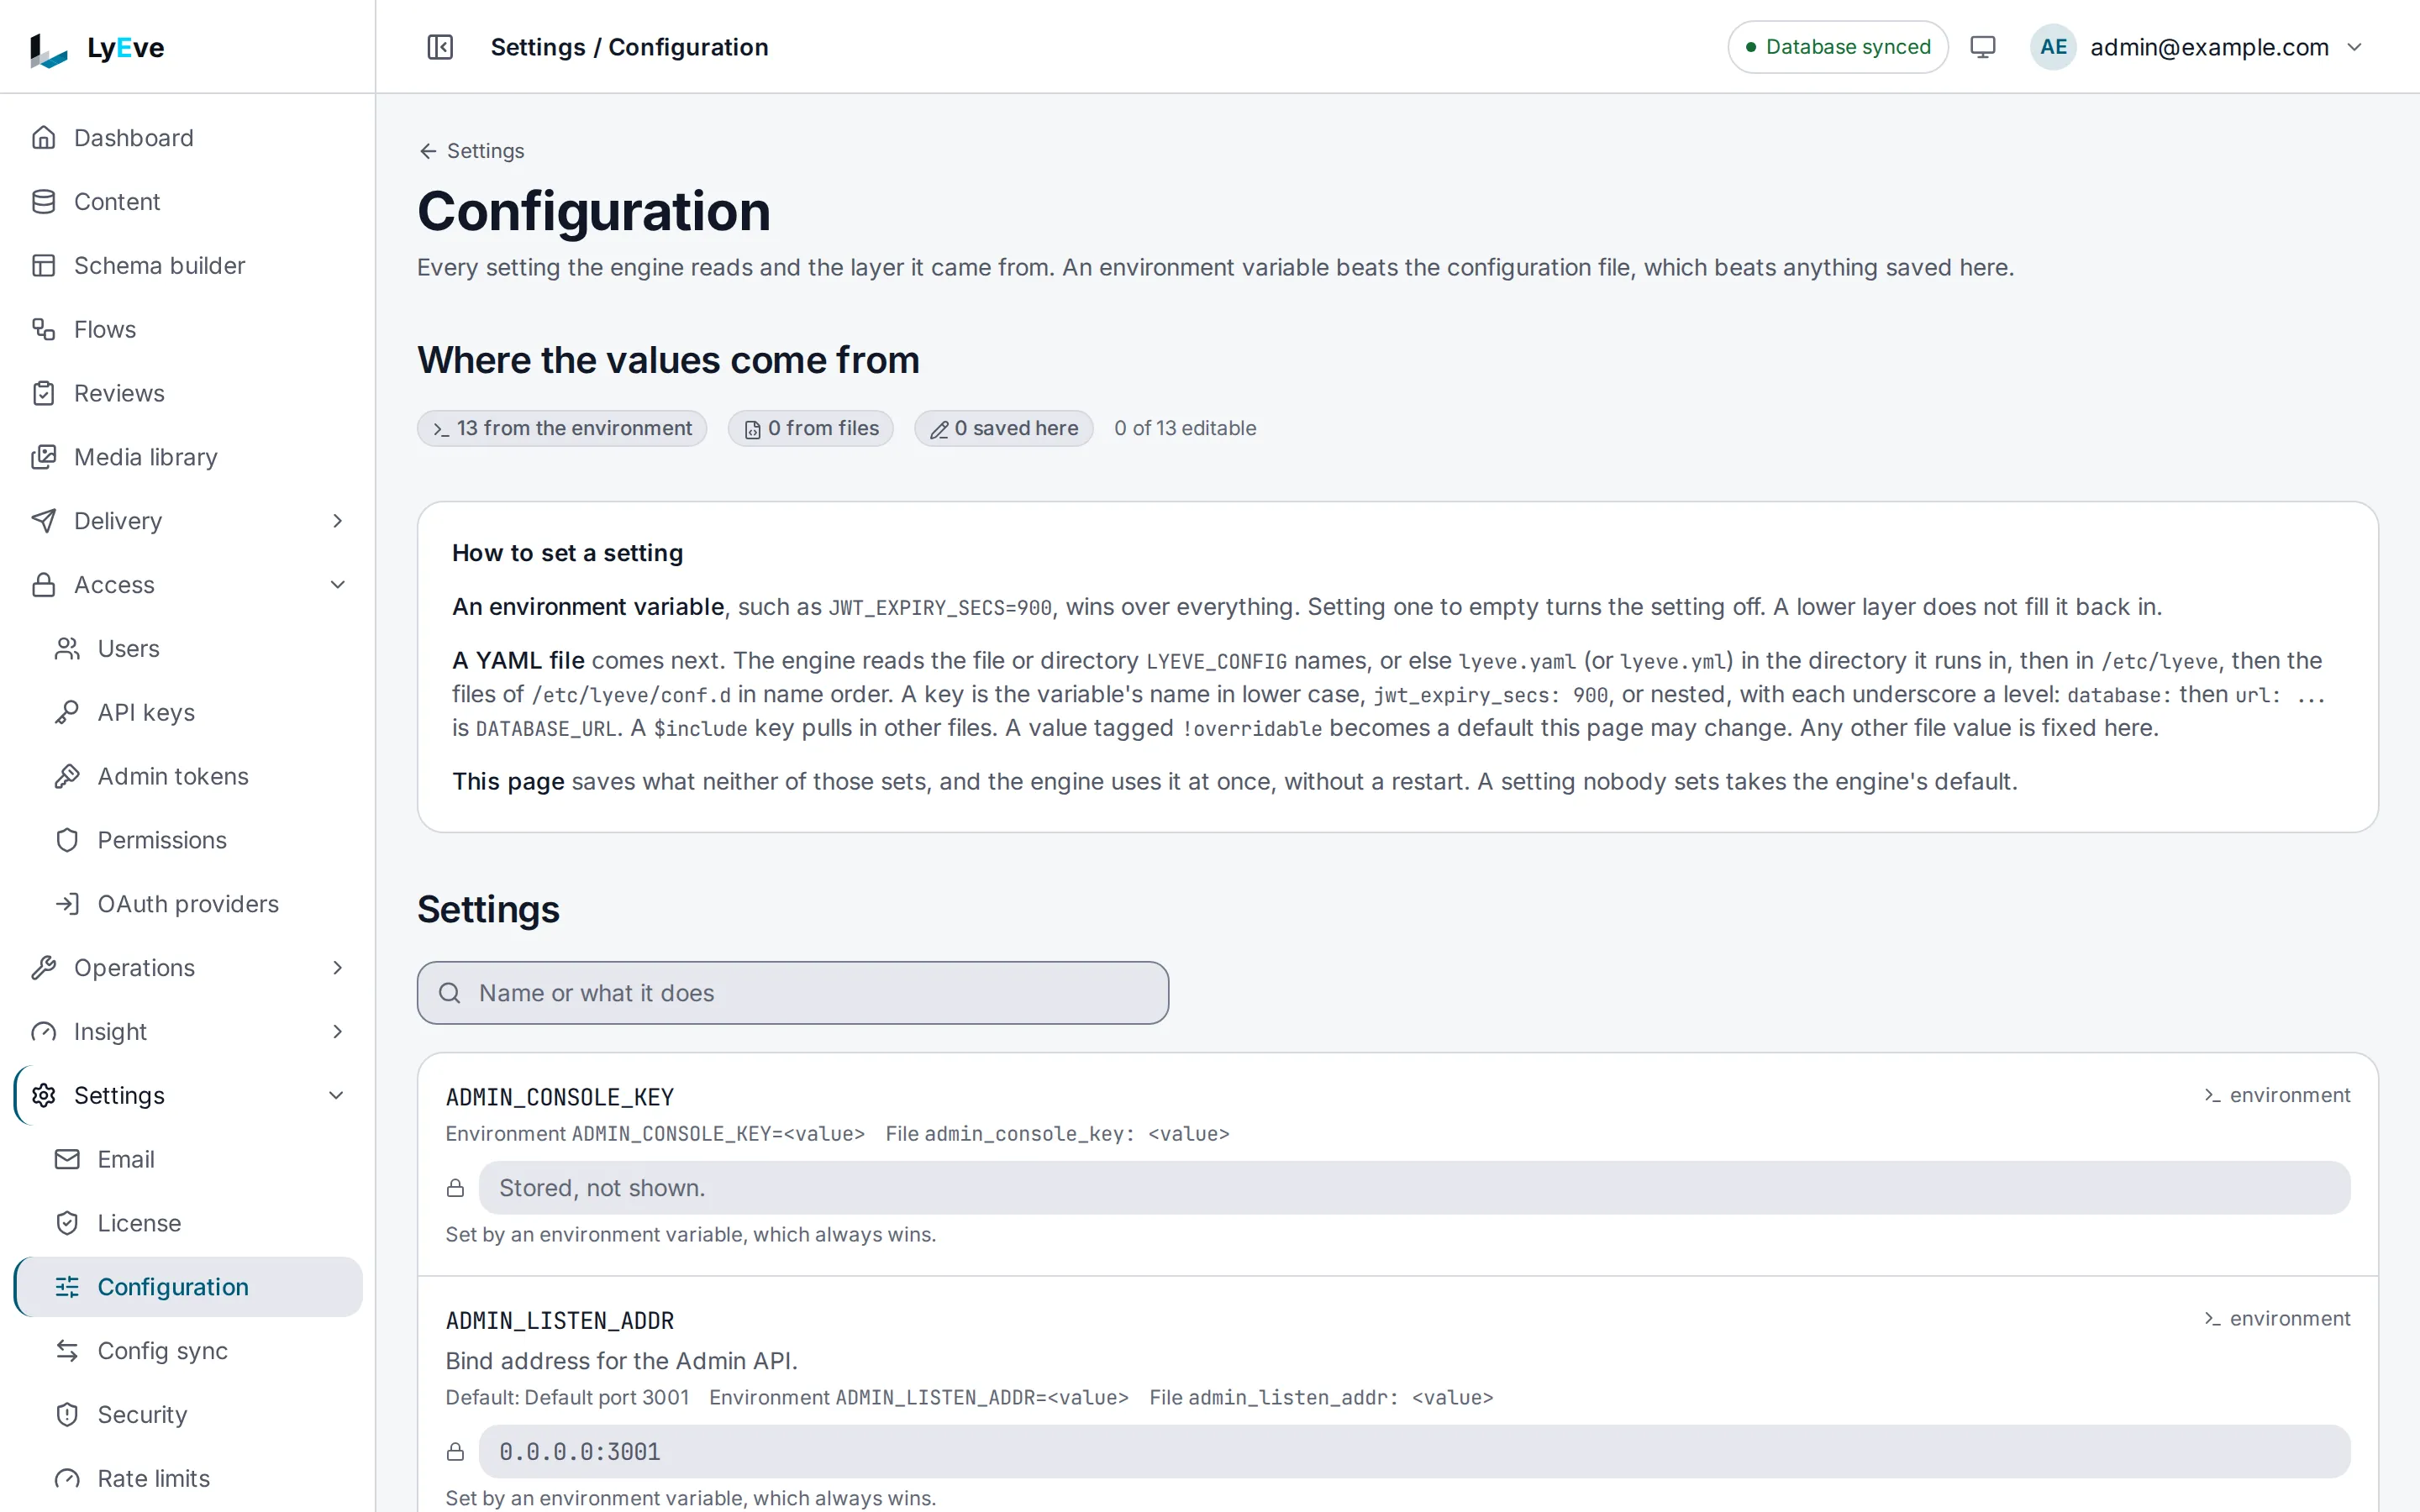
That page lists every setting the engine uses and where its value came from. A value the environment sets is read-only there. Change a setting covers the other places a setting can live, which changes take effect without a restart, and the settings to change with care.
8. Stop, start again or start over
Section titled “8. Stop, start again or start over”| Command | What it does |
|---|---|
docker compose stop | Stops every container. Your data stays |
docker compose start | Starts them again as they were |
docker compose down | Removes the containers. The volumes, and with them your data, stay |
docker compose down -v | Removes the containers and the volumes. Everything is gone, and the next start is a new install |
docker compose pull && docker compose up -d | Moves to the newest images. The engine updates its tables when it starts |
When something goes wrong
Section titled “When something goes wrong”| What you see | What to do |
|---|---|
| Port 8080 is already in use | Change the left side of "8080:8080", for example to "8090:8080", set ORIGIN and LYEVE_CONSOLE_URL to http://localhost:8090, run docker compose up -d and open the new address |
| Sign-in or setup fails with no clear reason | The address in the browser must match ORIGIN exactly. 127.0.0.1 and localhost are different addresses |
| The setup page says the console cannot reach the engine | The engine is still starting, or it stopped. docker compose logs engine shows which, and a refused start lists every problem at once |
| The setup page refuses the token | Copy the SETUP_TOKEN value again from .env, with nothing around it |
| A network address conflict when the stack starts | Another Docker network already uses 172.28.0.0/24. Pick a free range and change it in both networks and TRUSTED_PROXIES |
From your computer to a server
Section titled “From your computer to a server”This stack is for trying the product and for development. A server needs more:
| Here | On a server |
|---|---|
APP_ENV: development | The default, production, which refuses a weak configuration |
Plain http on port 8080 | TLS on port 443, with a DNS name for the console and one for the Content API |
sslmode=disable | TLS to the database |
SECURE_COOKIE, RATE_LIMIT_RPS and LYEVE_AUDIT_HMAC_KEY unset | All three set, because production refuses to start without them |
Docker Compose is the same four services set up for a server, and the Production checklist is what to confirm before you take traffic.